> ## Documentation Index
> Fetch the complete documentation index at: https://docs.trydepth.ai/llms.txt
> Use this file to discover all available pages before exploring further.
# Adding a New Repository
> Learn how to connect and index your GitHub repository with Depth AI
This guide covers how to connect GitHub to Depth AI and add repositories for indexing.
## Connect to GitHub
Before adding repositories, an organization admin needs to complete the GitHub integration.
Only organization admins can complete the GitHub integration. This step is required before any repositories can be added.
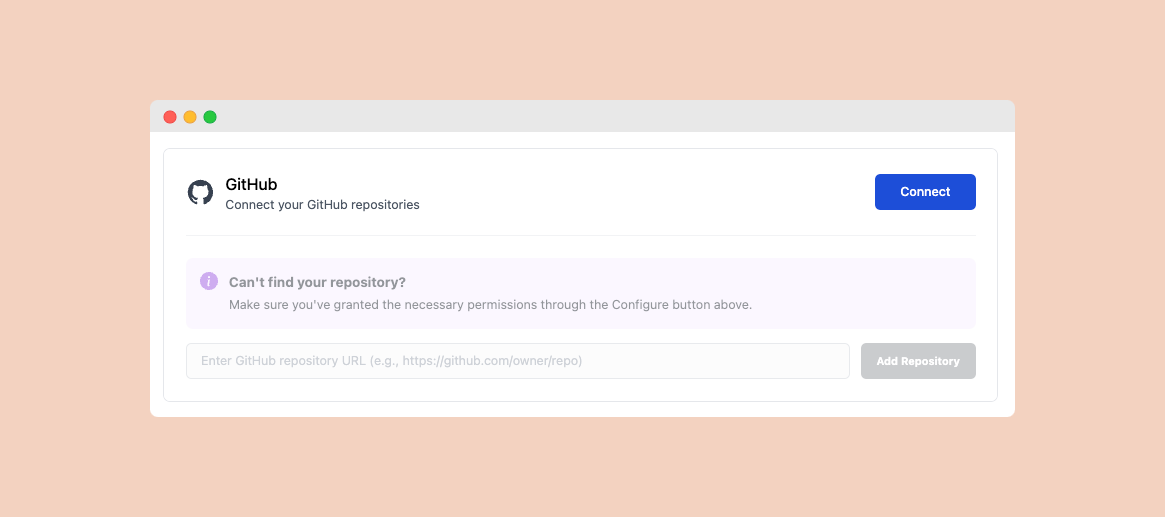
First, connect your GitHub account to Depth AI:
1. Navigate to the Settings page
2. Click on "Connect"
3. Authorize Depth AI to access your GitHub account
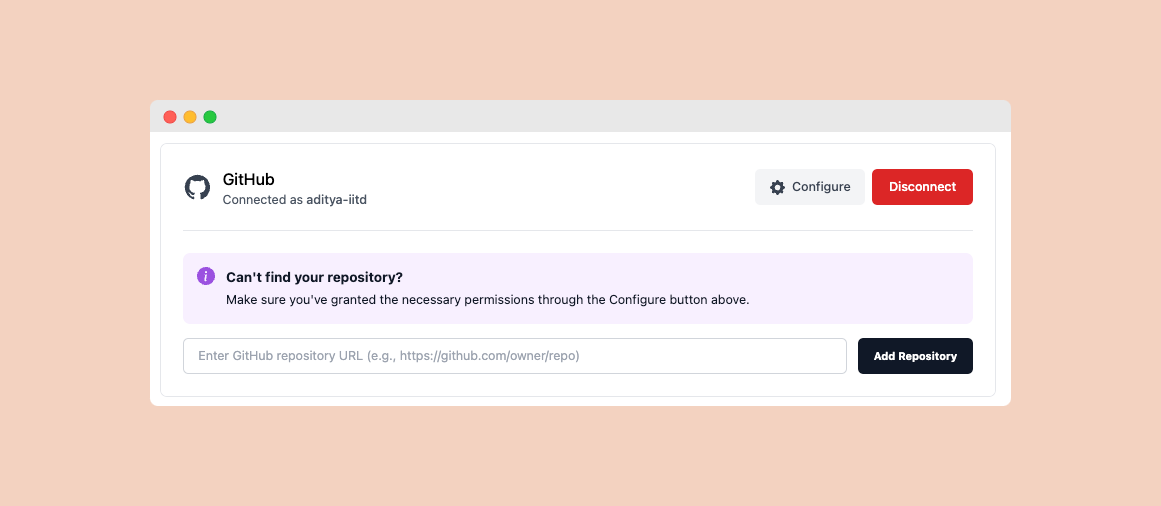
 Install the Depth AI GitHub app and configure repository permissions by clicking on "Configure" button:
1. Choose between "All repositories" or "Only select repositories"
2. Grant the required read permissions for the selected repositories
3. Click "Install" to complete the setup
Install the Depth AI GitHub app and configure repository permissions by clicking on "Configure" button:
1. Choose between "All repositories" or "Only select repositories"
2. Grant the required read permissions for the selected repositories
3. Click "Install" to complete the setup
 ## Add a Repository
Once GitHub is connected, you can start adding repositories for indexing.
All members of your organization will have access to the indexed repositories. Make sure you only index repositories that you want to share with your entire team.
Navigate to the repositories section and click on "Add Repository". Enter the GitHub repository URL you want to index.
## Add a Repository
Once GitHub is connected, you can start adding repositories for indexing.
All members of your organization will have access to the indexed repositories. Make sure you only index repositories that you want to share with your entire team.
Navigate to the repositories section and click on "Add Repository". Enter the GitHub repository URL you want to index.
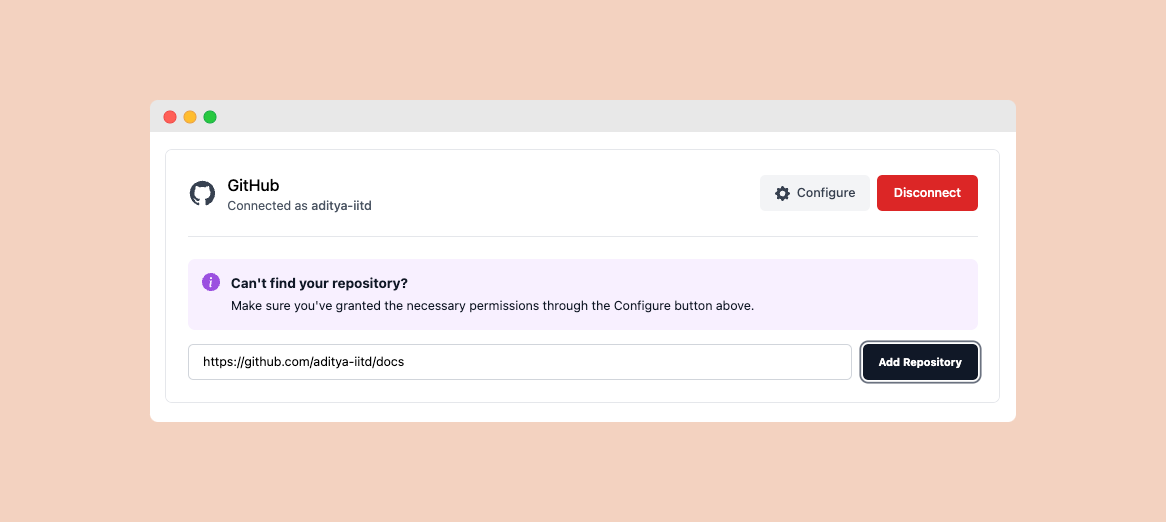 The system will check if Depth AI has the necessary permissions to access your repository.
If this is your first time adding a repository, you'll need to install and configure the Depth AI GitHub app.
The system will check if Depth AI has the necessary permissions to access your repository.
If this is your first time adding a repository, you'll need to install and configure the Depth AI GitHub app.
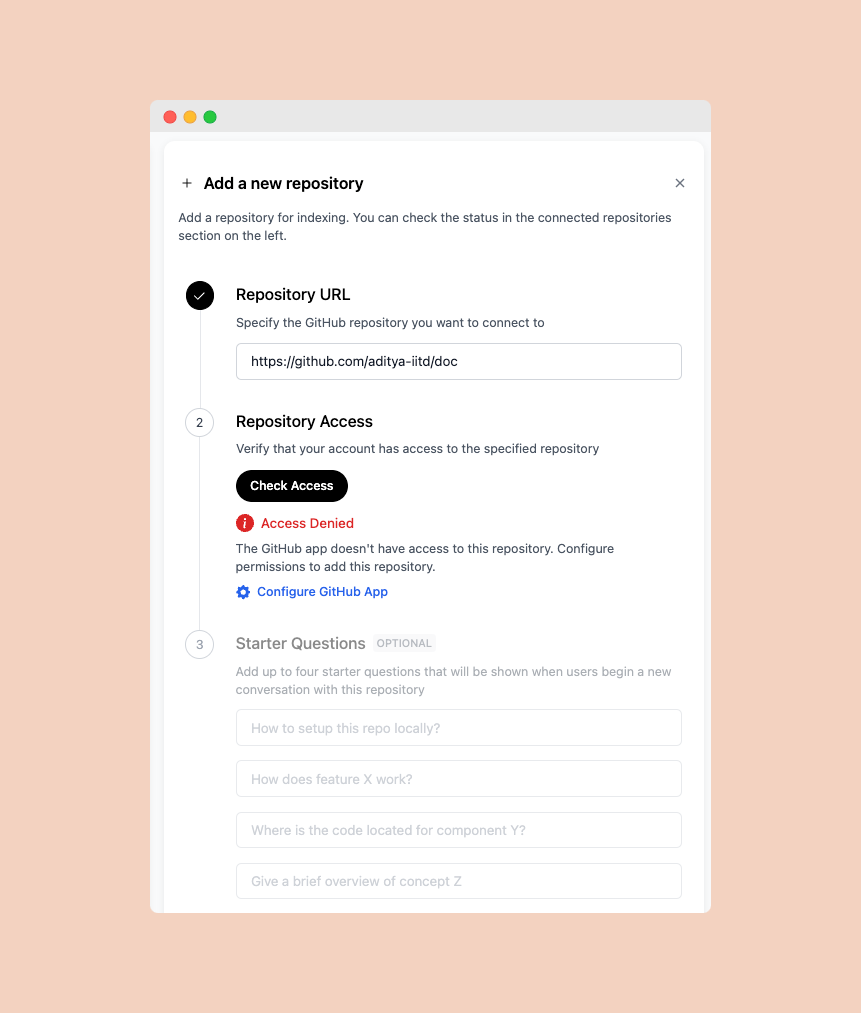 If access is denied, you'll need to configure the GitHub app permissions:
1. Click the "Configure GitHub App" button
2. You'll be redirected to GitHub's permission page
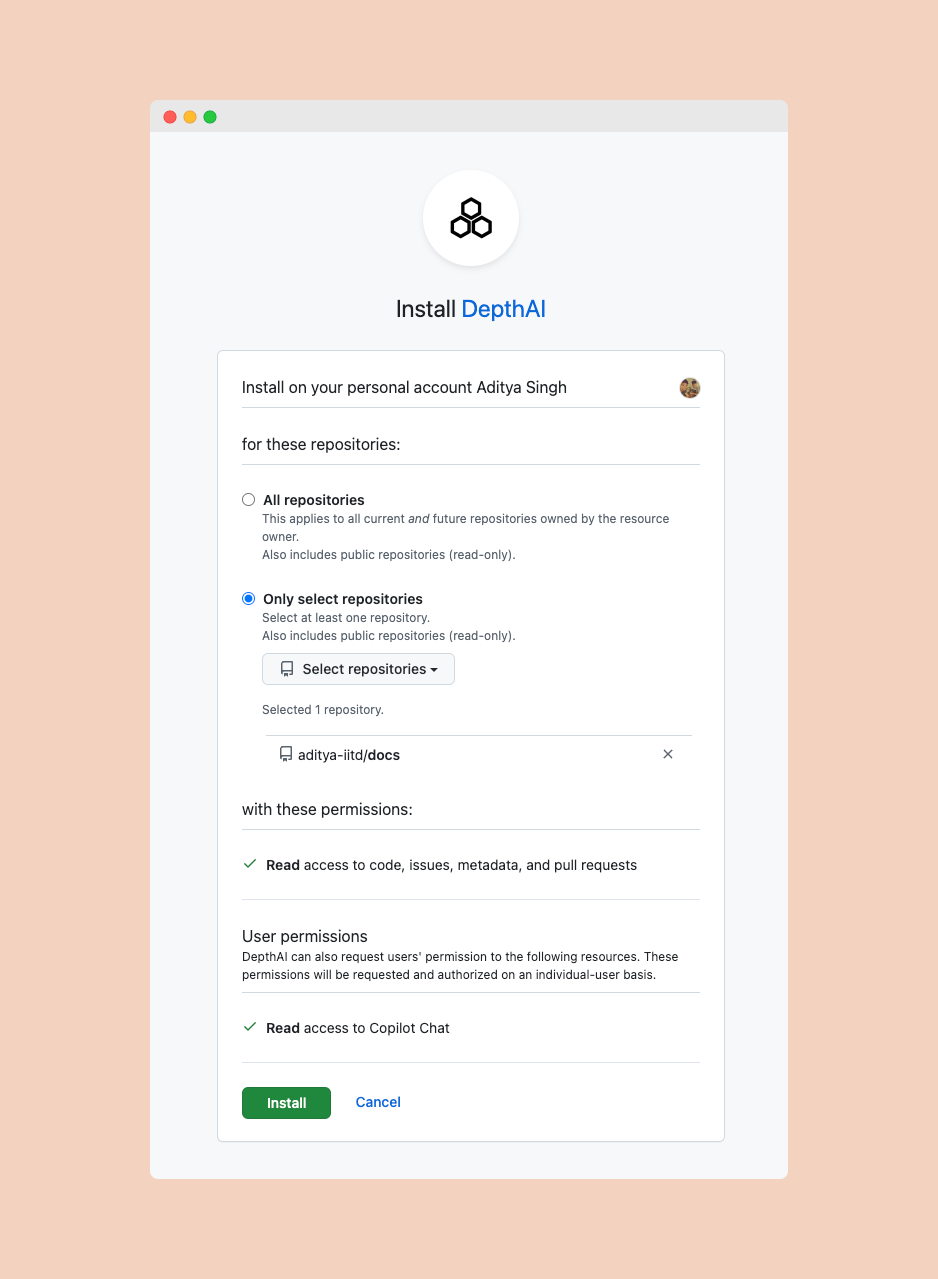
3. Choose either "All repositories" or "Only select repositories"
4. Grant the required permissions:
* Read access to code, issues, metadata, and pull requests
* Read access to Copilot Chat (optional)
If access is denied, you'll need to configure the GitHub app permissions:
1. Click the "Configure GitHub App" button
2. You'll be redirected to GitHub's permission page
3. Choose either "All repositories" or "Only select repositories"
4. Grant the required permissions:
* Read access to code, issues, metadata, and pull requests
* Read access to Copilot Chat (optional)
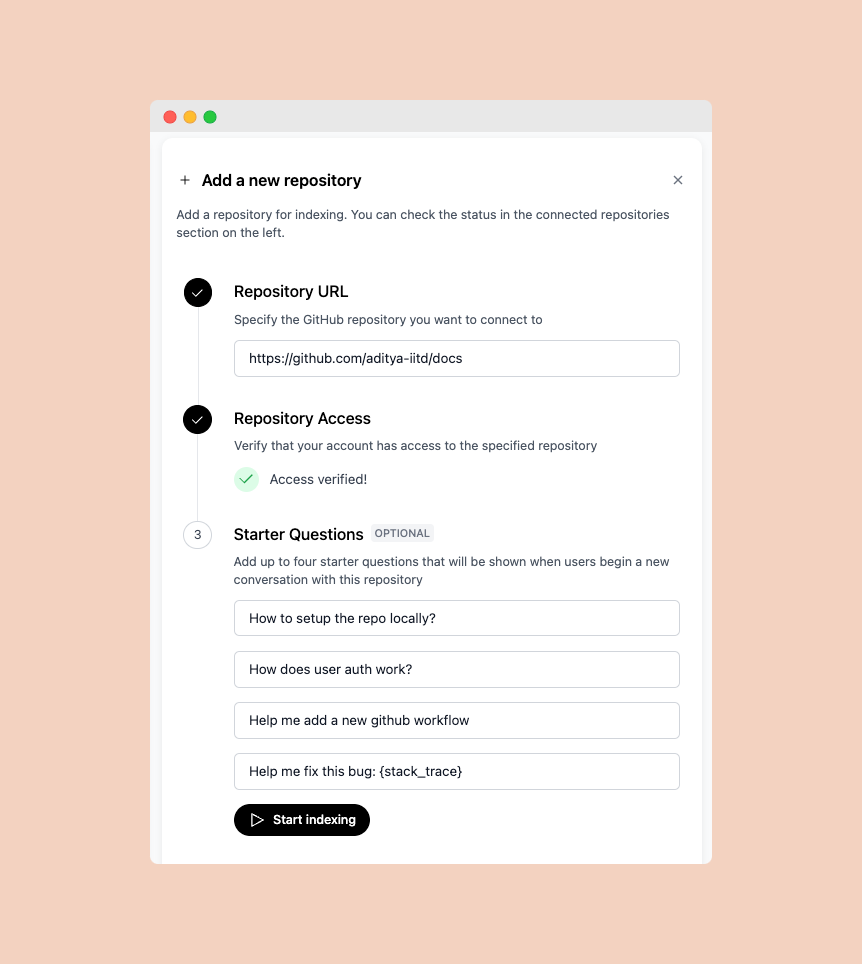
 You can add up to four starter questions that will be shown to users when they begin a new conversation with this repository. These could include:
* Setup instructions
* Common troubleshooting queries
* Feature-specific questions
* Bug reporting templates
Click on "Start Indexing" to begin the repository crawl.
You can add up to four starter questions that will be shown to users when they begin a new conversation with this repository. These could include:
* Setup instructions
* Common troubleshooting queries
* Feature-specific questions
* Bug reporting templates
Click on "Start Indexing" to begin the repository crawl.
 Wait for the indexing to complete. This may take a few hours for large repositories.
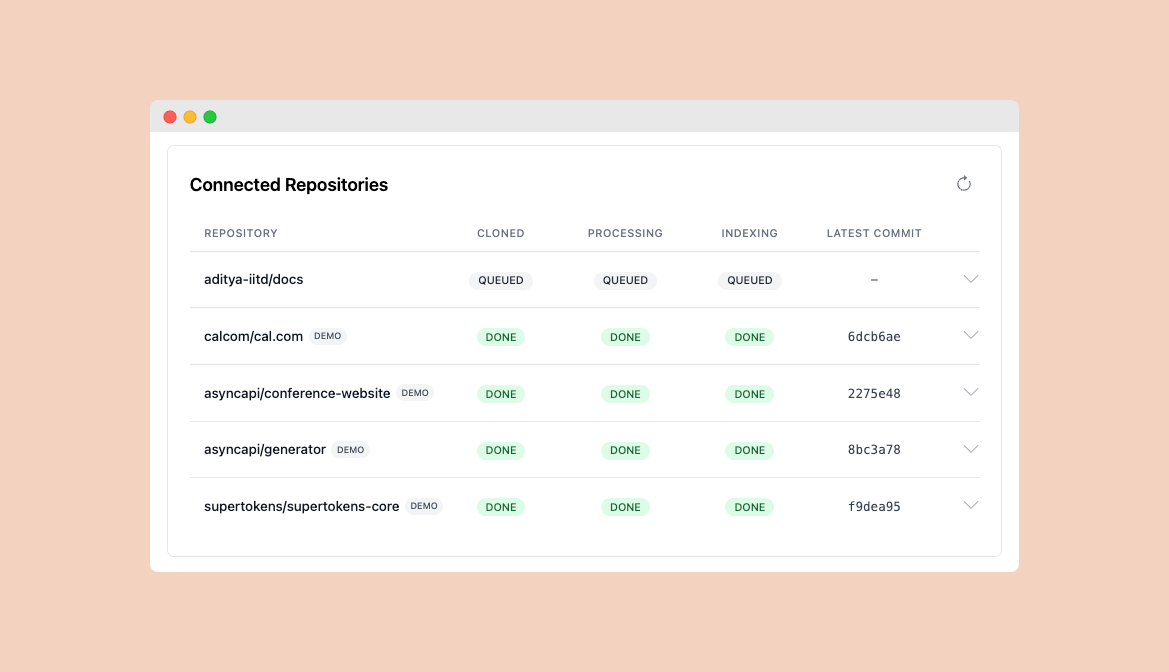 The indexing time depends on the repository size. Larger repositories may take longer to process.
Once all stages show "DONE", your repository is ready for chat!
The indexing time depends on the repository size. Larger repositories may take longer to process.
Once all stages show "DONE", your repository is ready for chat!