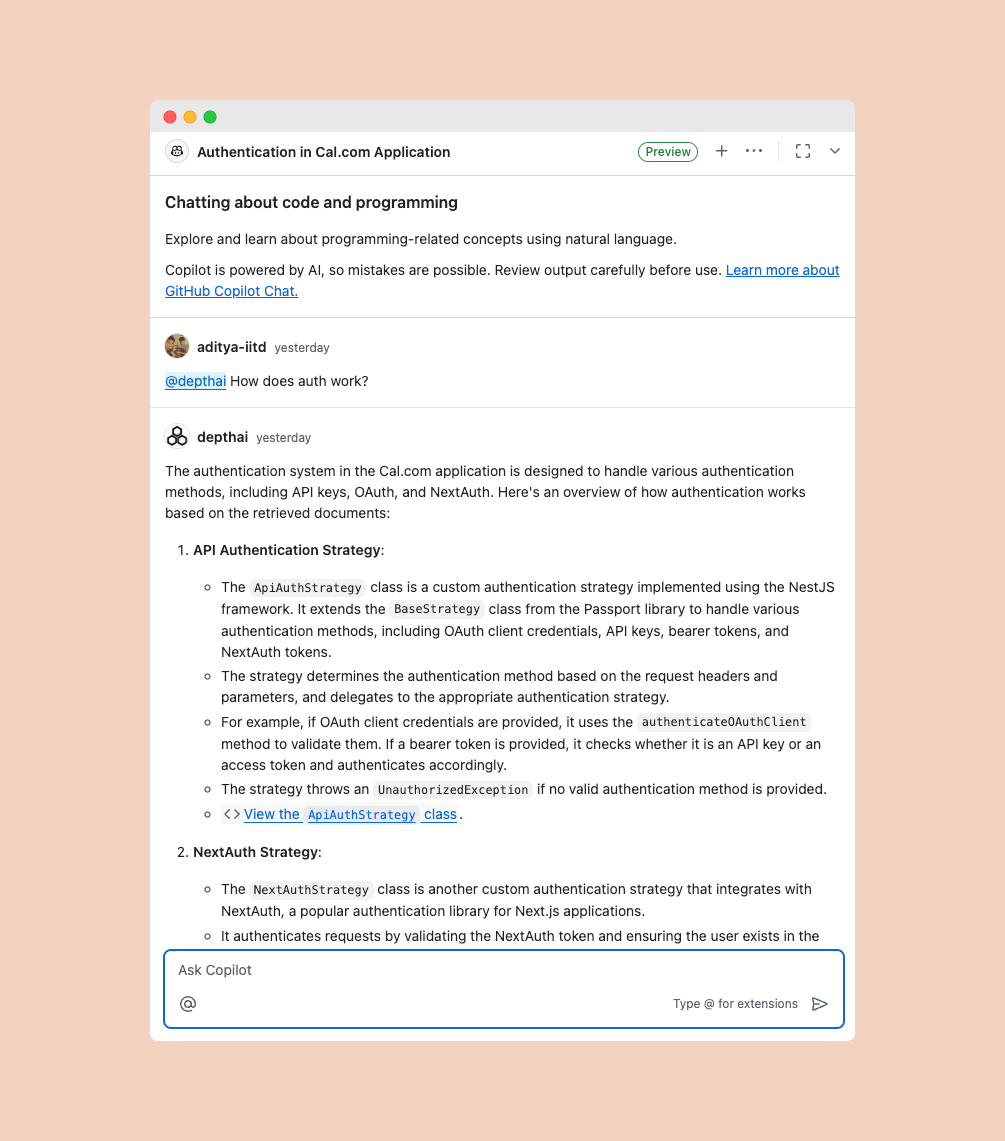
> ## Documentation Index
> Fetch the complete documentation index at: https://docs.trydepth.ai/llms.txt
> Use this file to discover all available pages before exploring further.
# GitHub Copilot
> Use Depth AI directly within GitHub Copilot across multiple platforms
Depth AI seamlessly integrates with GitHub Copilot, allowing you to access AI assistance directly within your development environment. This integration is available across multiple platforms:
Visual Studio Code editor
Visual Studio IDE
All JetBrains IDEs
GitHub web interface
GitHub mobile apps
## Getting Started
Ensure you have completed the GitHub integration setup before proceeding
After setting up the integration, you may need to:
* Restart your IDE
* Wait a few minutes for the integration to activate
* Ensure GitHub Copilot is properly installed in your IDE
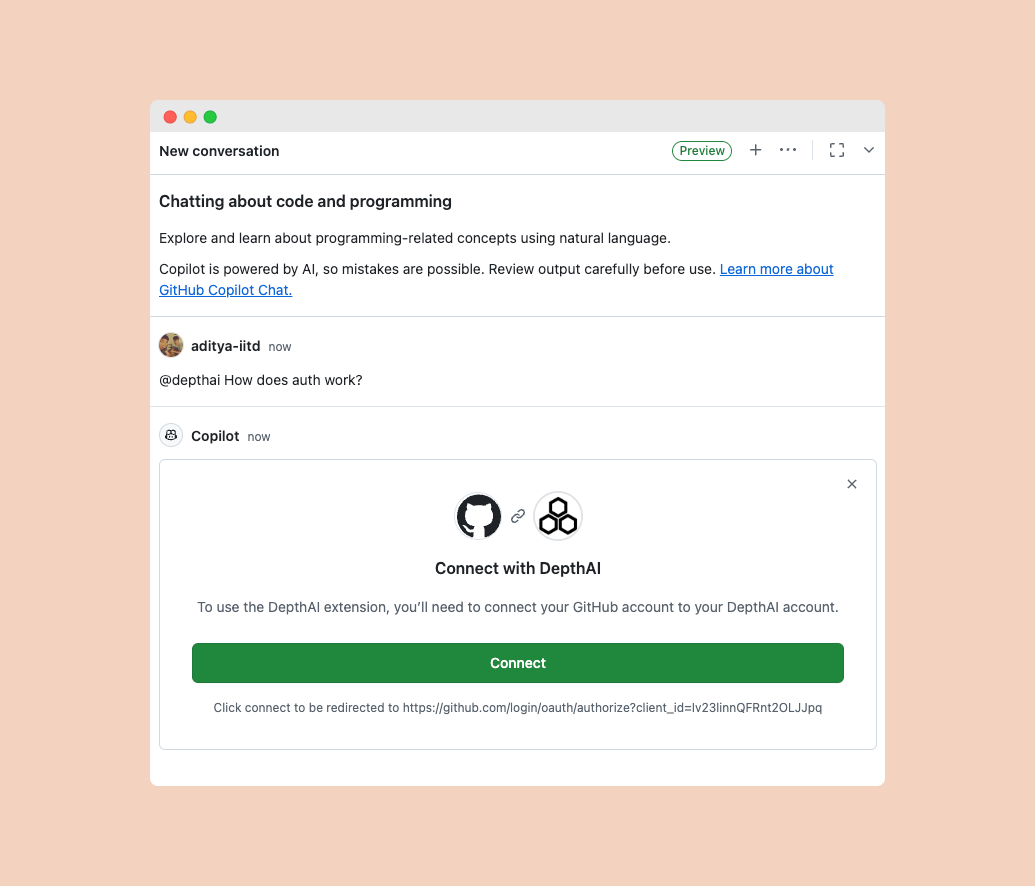
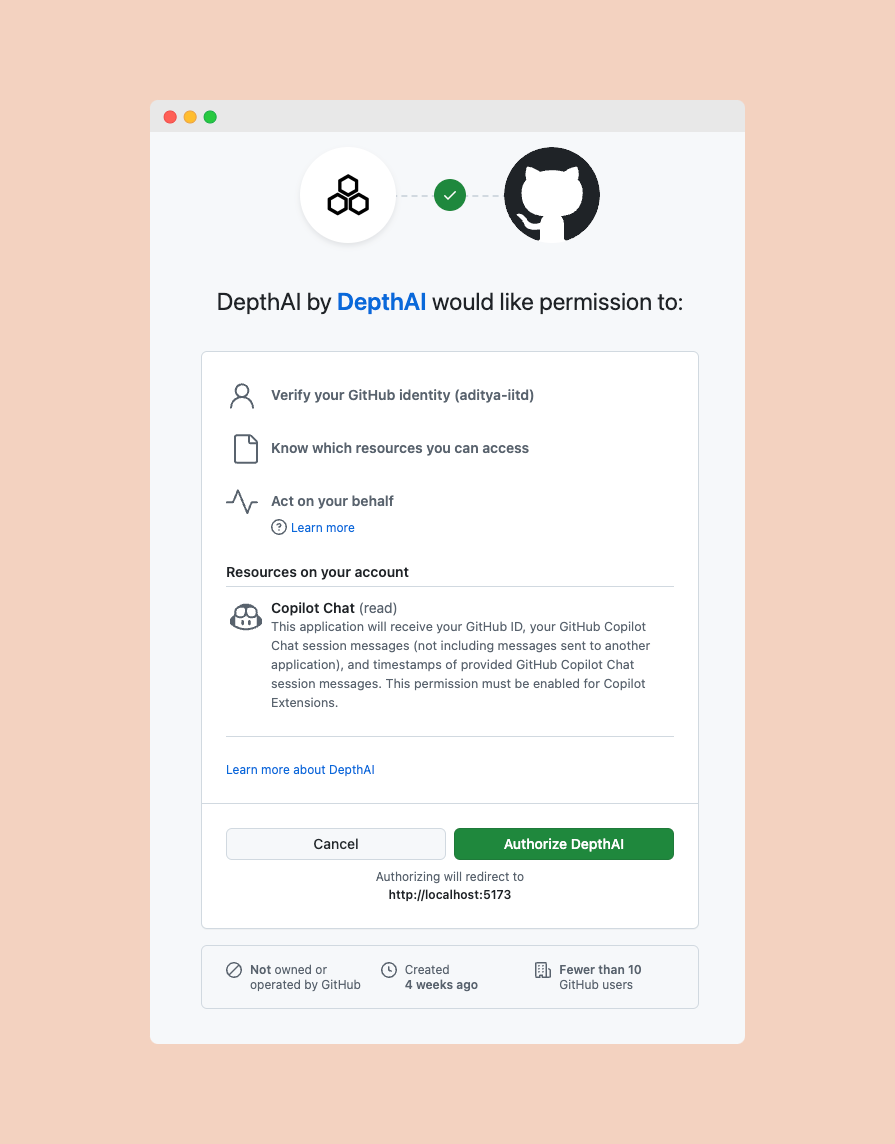
The first time you use Depth AI in Copilot, you'll need to complete a one-time authorization:
1. Tag `@depthai` in the Copilot chat
2. Click "Connect" in the authorization prompt
 3. Approve the GitHub authorization request
 After authorization, you'll need to set up your default repository in your Depth AI settings:
1. Go to [GitHub Copilot Settings](https://app.trydepth.ai/new-settings/copilot) page
2. Select the repository you want to use as context for your Copilot questions
After authorization, you'll need to set up your default repository in your Depth AI settings:
1. Go to [GitHub Copilot Settings](https://app.trydepth.ai/new-settings/copilot) page
2. Select the repository you want to use as context for your Copilot questions
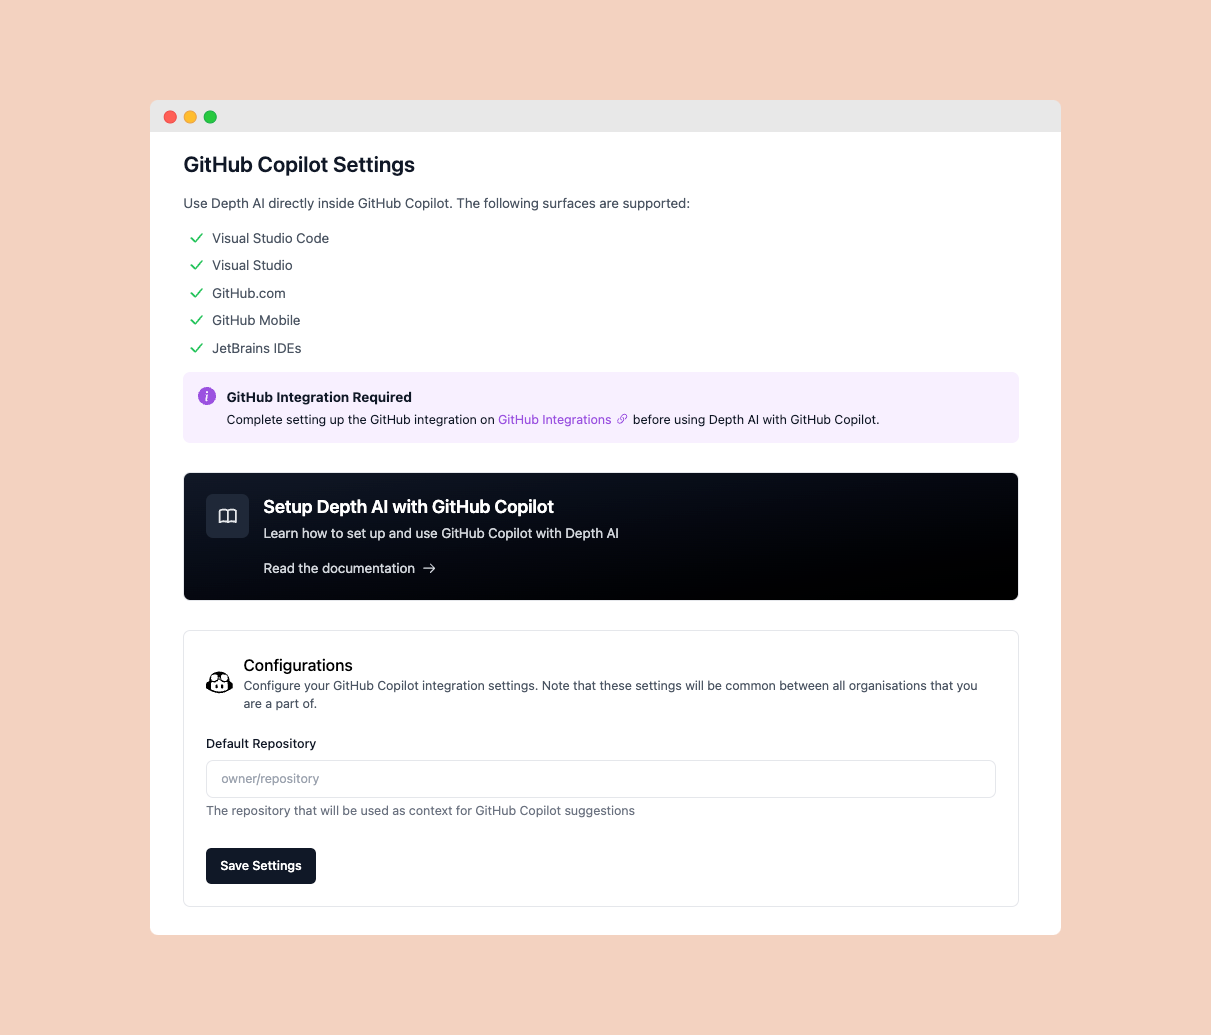 This repository will be used as the primary context when you ask questions through GitHub Copilot.
Once authorized, you can:
* Tag `@depthai` in any Copilot chat
* Ask questions about your code
* Get AI-powered assistance directly in your development workflow
This repository will be used as the primary context when you ask questions through GitHub Copilot.
Once authorized, you can:
* Tag `@depthai` in any Copilot chat
* Ask questions about your code
* Get AI-powered assistance directly in your development workflow